

Welcome to the latest installment of Arrikto’s ongoing series of blog posts that demonstrate how to take popular Kaggle competitions and convert them into Kubeflow Pipelines. All the converted Kaggle competitions in the series are contributed to the Kubeflow project for others to use and distribute.
Wait, What’s Kubeflow?
Kubeflow is an open source, cloud-native MLOps platform originally developed by Google that aims to provide all the tooling that both data scientists and machine learning engineers need. Features include model development, training, serving, AutoML, monitoring and artifact management. The latest 1.5 release features contributions from Google, Arrikto, IBM, Twitter and Rakuten. Want to try it for yourself? Get started in minutes, with a free trial of Kubeflow as a Service, no credit card required.
About the Facial Keypoints Detection Kaggle Competition
The objective of the Facial Keypoints Detection Kaggle competition, as the site notes, is to predict keypoint positions on face images. This can be used as a building block in several applications, such as:
- Tracking faces in images and video
- Analyzing facial expressions
- Detecting dysmorphic facial signs for medical diagnosis
- Biometrics/face recognition
In the world of machine learning, it is well known that detecting facial keypoints is a very difficult problem to solve. This is because facial features vary significantly from person to person, and even for a specific individual, there is a large amount of variation in facial images due to changing conditions such as 3D pose, size, position, viewing angle, and lighting. Although computer vision research has come a long way in addressing these difficulties, there still remain many opportunities for improvement!
Dr. Yoshua Bengio of the University of Montreal graciously provided the data set for this competition. You can find the data, files and notebook for this example on GitHub here.
Prerequisites for Building the Kubeflow Pipeline
Step 1: Setup Kubeflow as a Service
If you don’t already have Kubeflow up and running, we recommend signing up for a free trial of Kubeflow as a Service. Once Kubeflow is deployed, login and create a new Notebook Server.
Step 2: Launch a new Notebook Server
For the purposes of this competition you’ll need to bump the memory to 2 GB and xCPUs to 2. The rest of the defaults should be fine.
Step 3: Clone the Project Repo to Your Notebook
Open up a terminal in the Notebook Server and git clone the kubeflow/examples repository.
$ git clone https://github.com/kubeflow/examples
Step 4: Setup DockerHub and Install Docker
Kubeflow relies on Docker images to create pipelines. These images are pushed to a Docker container registry, from which Kubeflow accesses them. For the purposes of this how-to we are going to use Docker Hub as our registry.
If you don’t already have an account, make sure to sign up for DockerHub and either install the docker utility in your terminal or install Docker Desktop locally.
Step 5: Create a Kaggle Account & API Token
The data needed to run this tutorial needs to be downloaded from Kaggle. To do this we need to create a Kaggle account.
After creating your account, you’ll need to create an API Token. Click on your profile picture in the top right and select “Account” from the menu as follows:
Scroll down to the “API” section and click “Create New API Token”.

This will download a file ‘kaggle.json’ with the following contents:
{"username":"your_username","key":"your_key"}
Step 6: Create a Kubernetes Secret
A Kubernetes Secret is an object that contains a small amount of sensitive data such as a password, a token, or a key. Using a Secret means that you don’t need to include confidential data in your application code. Create a secret with your Notebook Server’s terminal by substituting your “username” for <username> and your “key” for <api_token> and create a Kubernetes secret using:
kubectl create secret generic kaggle-secret --from-literal=KAGGLE_USERNAME=<username> --from-literal=KAGGLE_KEY=<api_token>
Step 7: Install Git
If you don’t have it already, install Git locally.
Step 8: Clone the kubeflow/examples repo
Clone the kubeflow/examples repo locally with the following command:
$ git clone https://github.com/kubeflow/examples
Step 9: Create a PodDefault resource
We need a way to inject common data (env vars, volumes) to pods. In Kubeflow we use the PodDefault resource which serves this use case. Using the PodDefault resource we can attach a secret to our data pulling step container which downloads data using Kaggle API. In your Kubeflow Notebook Server navigate to the facial-keypoints-detection-kaggle-competition directory. Now, create a resource.yaml file with the following code:
Apply the yaml with the following command in your Notebook’s terminal:
kubectl apply -f resource.yaml
Building the Kubeflow Pipeline
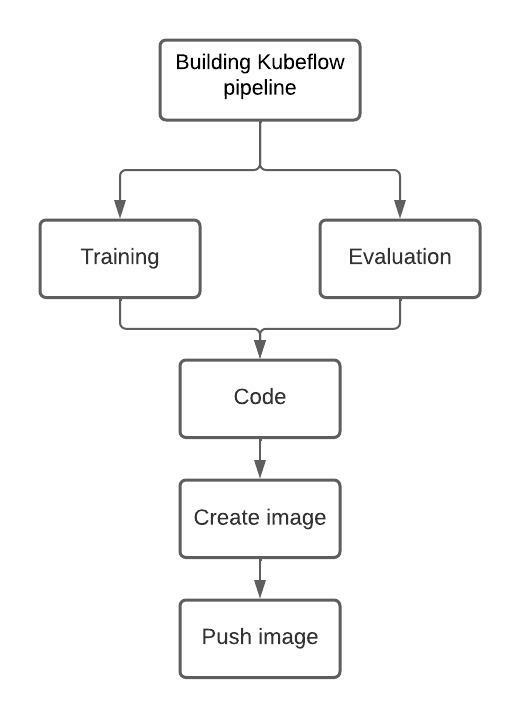
We start our process by training our model, storing the trained model in an external volume attached to the pipeline and then evaluating the trained model.
Step 1: Explore the train pipeline component
Locally, navigate to the facial-keypoints-detection-kaggle-competition/pipeline-components/train directory and open up the train.py file. Note that the code in this file will perform the actions required in the “train” pipeline step
Next, let’s take note of the packages needed to run the code required to train and save the model. The required packages include:
- Keras
- AutoKeras
- Kaggle
Step 2: Building the train Docker image
Now, let’s create our Docker image that will run this code. This image will act as our reproducible Kubeflow Pipelines training component. Make sure to substitute in your DockerHub information. Locally, navigate to the facial-keypoints-detection-kaggle-competition/pipeline-components/train directory.
Build the Docker image if locally you are using arm64 (Apple M1):
docker build --platform=linux/amd64 -t <docker_username>/<docker_imagename>:<tag>-amd64 .
Or, build the Docker image if locally you are using amd64:
docker build -t <docker_username>/<docker_imagename>:<tag> .
Step 3: Push the train Docker image to DockerHub
After building the Docker image we are ready to push it to DockerHub. Locally, navigate to the facial-keypoints-detection-kaggle-competition/pipeline-components/train directory
Push the Docker image if locally you are using arm64 (Apple M1)
docker push --platform=linux/amd64 -t
<docker_username>/<docker_imagename>:<tag>-amd64 .
Or, push the Docker image if locally you are using amd64
docker push -t <docker_username>/<docker_imagename>:<tag> .
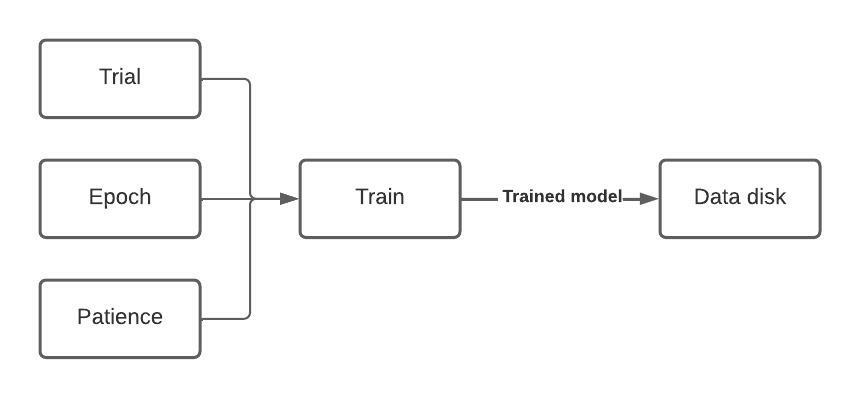
At this point we have created a training component which accepts three inputs, trains the model and stores trained models on a PVC.
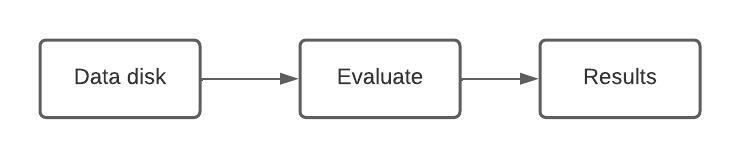
Step 4: Explore the eval pipeline component
Next, let’s look at a function to evaluate the model trained in the previous step.
Locally, navigate locally to the facial-keypoints-detection-kaggle-competition/pipeline-components/eval directory. Now, open up the eval.py file. Note that the code in this file will perform the actions required in the “eval” pipeline step
Take note of the packages we need to run this code:
- Tensorflow
- Keras
- Autokeras
Step 5: Build the eval Docker Image
Next, let’s create the Docker image that will run this code. The image will act as our reproducible Kubeflow Pipeline eval component. Locally, navigate to the facial-keypoints-detection-kaggle-competition/pipeline-components/eval directory.
Build the Docker image if locally you are using arm64 (Apple M1)
docker build --platform=linux/amd64 -t
<docker_username>/<docker_imagename>:<tag>-amd64 .
Or, build the Docker image if locally you are using amd64
docker build -t <docker_username>/<docker_imagename>:<tag> .
With our Docker image built, we now have reproducible evaluation code which Kubeflow can run.
Step 6: Push the eval Docker Image to DockerHub
Navigate locally to the facial-keypoints-detection-kaggle-competition/pipeline-components/eval directory.
Push the Docker image if locally you are using arm64 (Apple M1):
docker push --platform=linux/amd64 -t
<docker_username>/<docker_imagename>:<tag>-amd64 .
Or, push the Docker image if locally you are using amd64:
docker push -t <docker_username>/<docker_imagename>:<tag> .
To recap, so far we have created a training component which accepts three inputs, trains the model and stores trained models on a data-disk attached to the pipeline. This trained model is in turn accepted by the evaluate block and results are stored in a .csv file format.
Step 7: Modify the KFP DSL Code to Generate the Kubeflow Pipeline
Until now, we have generated each component (train and evaluate) individually. In this step we’ll combine these components to form a Kubeflow pipeline. Navigate to the facial-keypoints-detection-kaggle-competition directory in your Notebook. Open the facial-keypoints-detection-kfp.py file. Below, is the generic structure of how the different components communicate in a Kubeflow pipeline.
Modify the two sections below to reflect the images you pushed to DockerHub and save your changes.
—- AND —
Step 8: Generate a KFP Pipeline yaml file
Navigate to the facial-keypoints-detection-kaggle-competition directory in your Notebook. Run the following command to generate a yaml file for the Pipeline:
$ python3 facial-keypoints-detection-kfp.py
Next, download the facial-keypoints-detection-kfp.py.yaml file that was created to your local directory.
Note: Make sure the file is recognized as a yaml file. Depending on your local system, you might need to remove “py” from the extension.
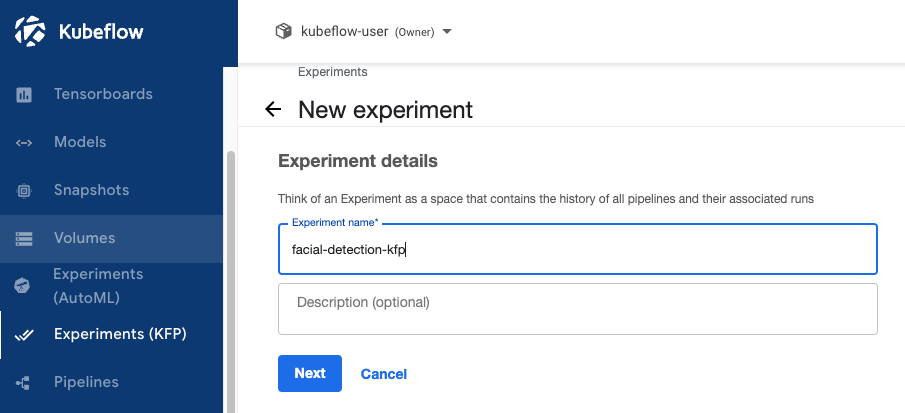
Step 9: Create an Experiment
In the Kubeflow Central Dashboard, navigate to the Experiments (KFP) > Create Experiment view. Name the experiment and click Next. Now, click on Experiments (KFP) to view the experiment you just created.
Step 10: Create a Pipeline
In the Kubeflow Central Dashboard, navigate to the Pipelines > +Upload Pipeline view. Next, name the pipeline. Then click on Upload a file and
upload the local facial-keypoints-detection-kfp.py.yaml file. Click Create to create the Pipeline.
Step 11: Create a Run
To create a Pipeline Run, execute the following steps:
- Click on Create Run in the view from the previous step
- Name the run
- Choose the pipeline and experiment we created previously
- Specify “1” for “trial” parameter
- Specify “1” for “epoch” parameter
- Specify “1” for “patience” parameter
- Click Start
- Click on the run name to view the runtime execution graph
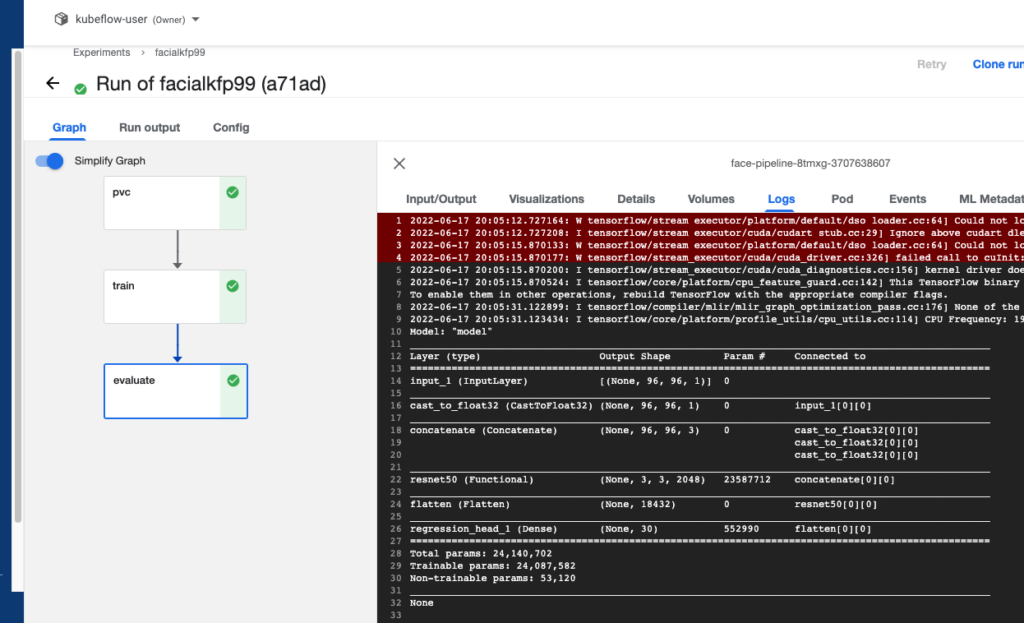
Step 12: View the Runtime Execution Graph
The Pipeline steps we defined in the previous steps will populate the runtime execution view in real time. Click on a step to get details.
That’s it! You now have Kaggle’s Facial Keypoints Detection competition running as a reproducible Kubeflow Pipeline.
Is There an Easier Way to Create a Kubeflow Pipeline?
You bet! If you want to automate most of the steps illustrated in the previous example, then we recommend making use of the open source JupyterLab extension called Kale. Kale is built right into Kubeflow as Service and provides a simple UI for defining Kubeflow Pipelines directly from your JupyterLab notebook, without the need to change a single line of code, or build and push Docker images. In this next example, we’ll show you just how easy it is.
Understanding Kale Tags
With Kale you annotate cells (which are logical groupings of code) inside your Jupyter Notebook with tags. These tags tell Kubeflow how to interpret the code contained in the cell, what dependencies exist and what functionality is required to execute the cell.
Step 1: Open the Kale Notebook
On your Notebook Server, navigate into the following directory:
/examples/facial-keypoints-detection-kaggle-competition
Open the facial-keypoints-detection-kale.ipynb notebook
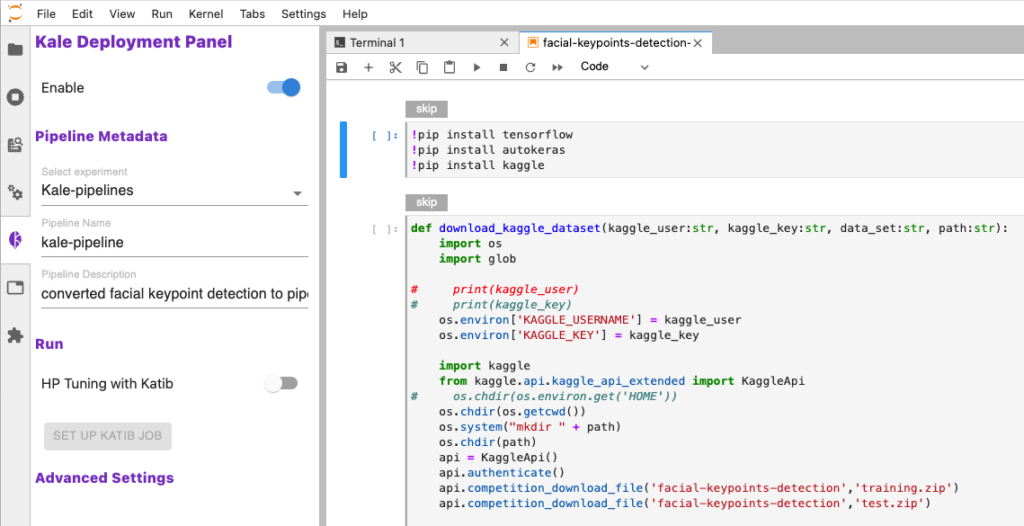
Step 2: Annotate the Notebook with Kale Tags
Click on the Kale icon and enable the Kale deployment panel.
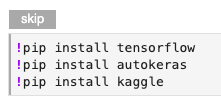
Step 3: Install Python packages
Install the necessary Python packages by running the cell labeled with the “skip” annotation. After the installation, restart the notebook kernel.
Step 4: Input Kaggle Account Information
Manually input your info for the KAGGLE_USERNAME and KAGGLE_KEY variables in the next cell block.
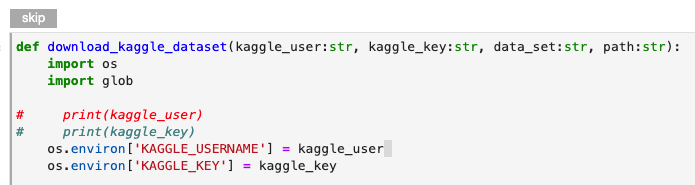
After doing so, run the download_kaggle_dataset cell labeled with the “skip” annotation. Note: For security purposes, delete the lines with your credentials after you have downloaded the data.
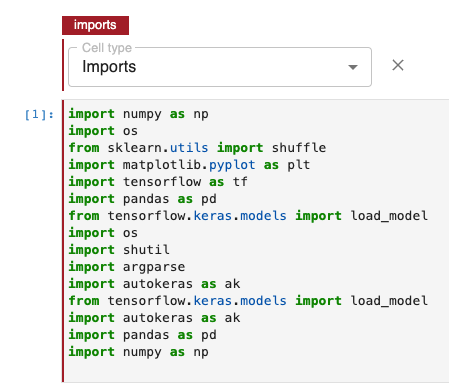
Step 5: Imports
Note that the next cell is annotated with the “Imports” tag and will import the necessary libraries for us.
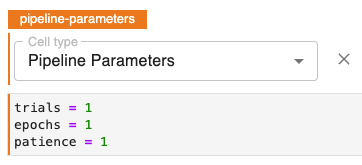
Step 6: Pipeline parameters
Note that the next cell is annotated with the “pipeline-parameters” tag which specifies our pipeline parameters.
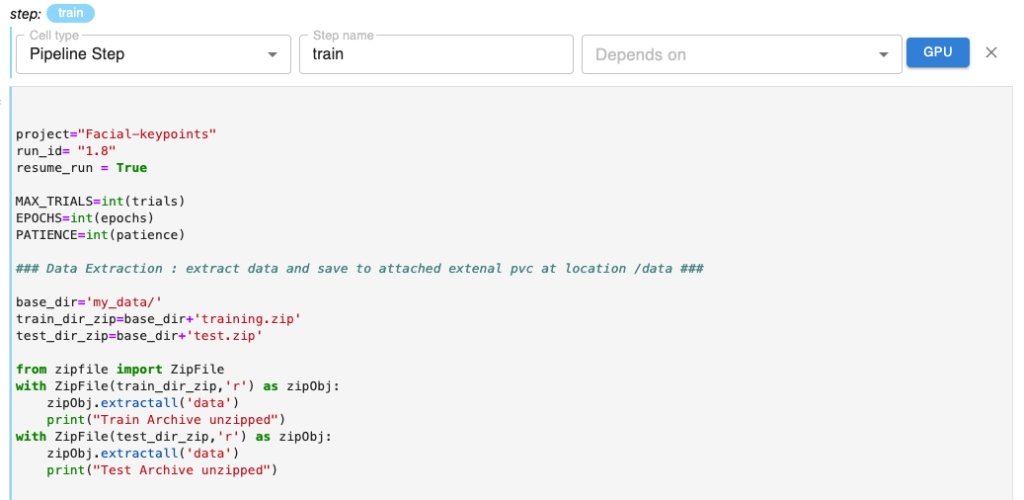
Step 7: The train Pipeline Step
The next cell is tagged with the “Pipeline Step” tag which will ultimately be the training pipeline step.
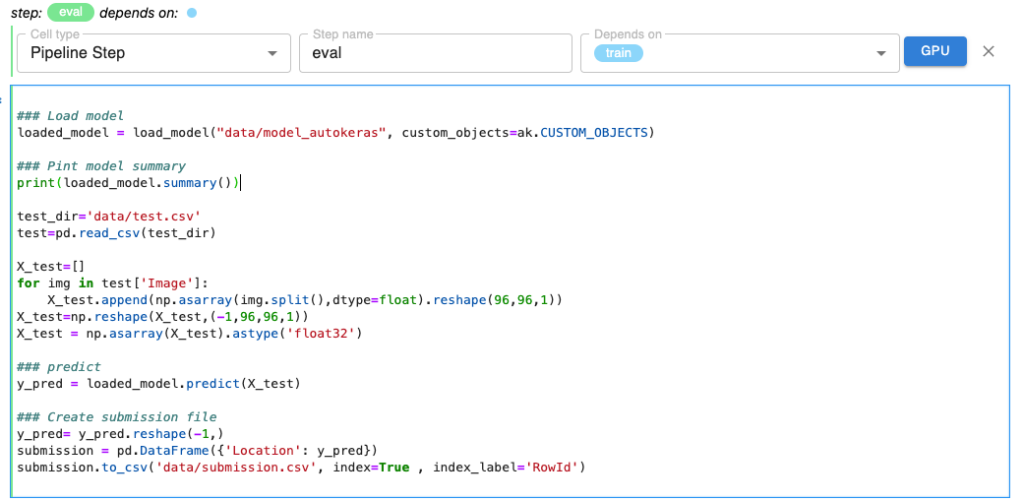
Step 8: The eval Pipeline Step
The next cell is tagged with the “Pipeline Step” tag which will ultimately be the evaluation pipeline step. Annotate the next cell that is the model evaluation pipeline step with the “Pipeline Step”. Note that it depends on the “train” step.
Step 9: Run the Pipeline with Kale
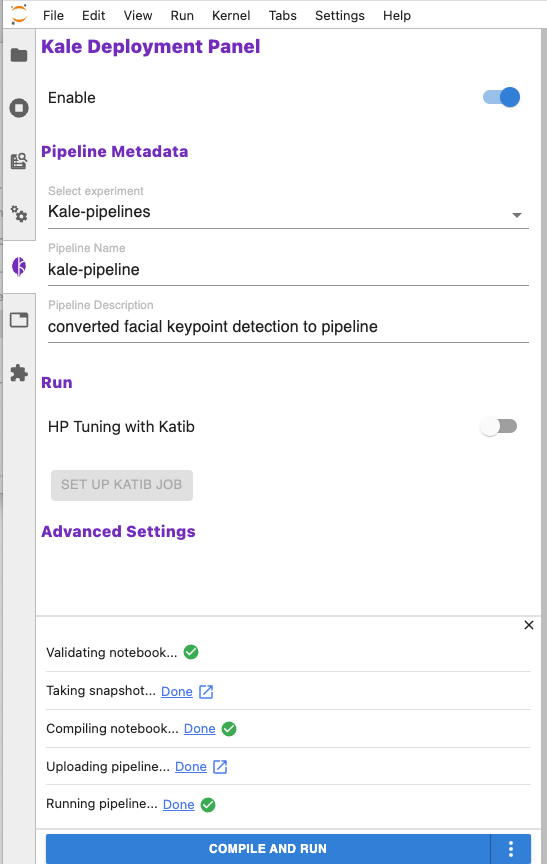
In the Kale deployment panel click “compile and run” and Kale will:
- Validate the notebook
- Take a snapshot, so the whole environment is versioned
- Compile the notebook into a Kubeflow pipeline
- Upload the pipeline
- Run the pipeline
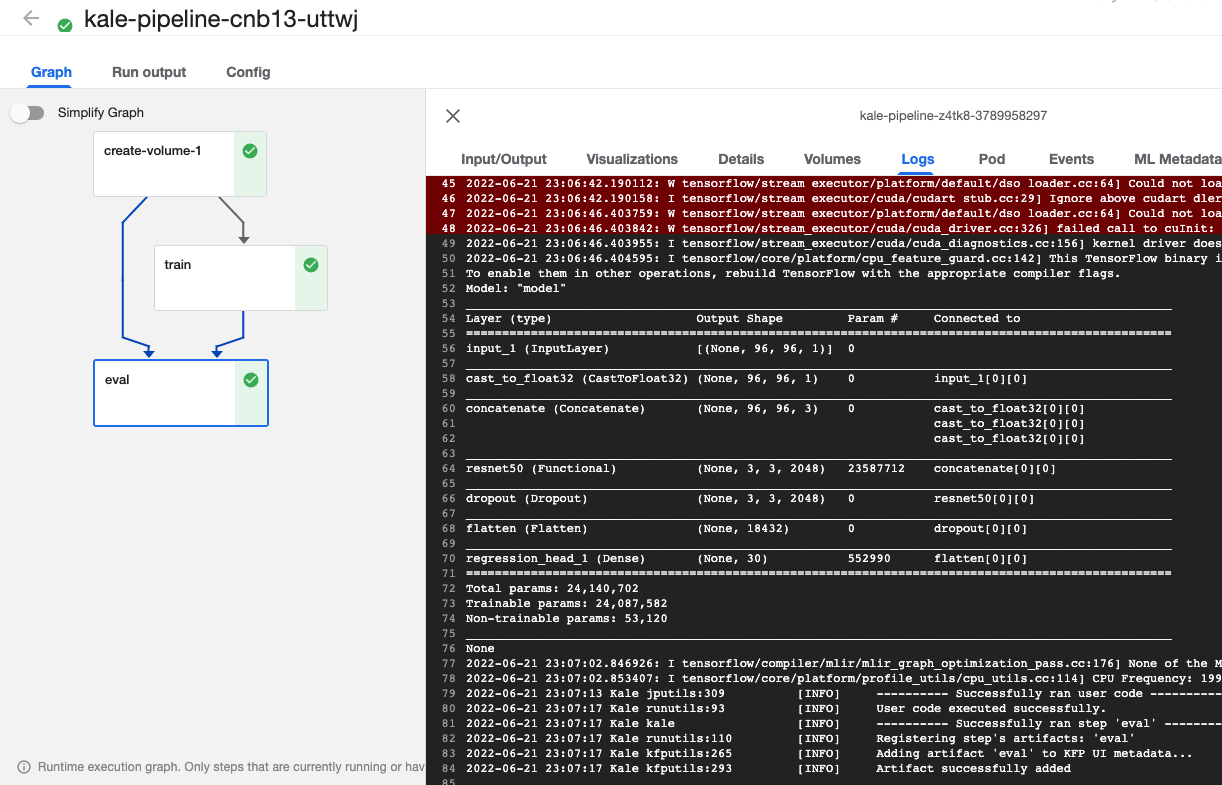
Step 10: View the Execution Graph
In the “Running pipeline” output, click on the “View” hyperlink. This will take you directly to the runtime execution graph where you can watch your pipeline execute and update in real time.
That’s it! You now have Kaggle’s Facial Keypoints Detection competition running as a reproducible Kubeflow Pipeline with less coding and steps thanks to Kale.
By using Kale we eliminated the following steps from the previous example:
- Building the training component
- Building the training image
- Pushing the Docker image to the Docker registry
- Building the evaluate component
- Building the evaluate image
- Pushing the image to Docker registry
- Writing the KFP DSL code to generate the Kubeflow Pipeline
You can find the data, files and notebook for this example on GitHub here.
What’s Next?
- Get started with Kubeflow in just minutes, for free. No credit card required!
- Get the code, data and notebooks used in this example
- Try your hand at converting a Kaggle competition into a Kubeflow Pipeline