

We are today excited to announce the immediate availability of the leading Kubeflow distribution, MiniKF, on the AWS Marketplace!
Users have been able to easily and quickly deploy MiniKF on Google Cloud, and their laptop via Vagrant, since November 2019.
This has proven to be highly successful for data scientists and machine learning engineers, with over 100 companies deploying MiniKF on Google Cloud, and more than 18,000 downloads via Vagrant.
Continuing our commitment to make the process of building, testing, training, and deploying machine learning models easier for data scientists, we have now publicly released MiniKF on AWS to power GitOps for ML.
Our MiniKF tutorials are the fastest and easiest way to learn the new ML workflows in Kubeflow 1.1 and you can now experiment on AWS as well as GCP.
Users can enjoy push-button deployments of an all in one platform for their machine learning on Kubernetes efforts. This includes a self-contained instance powered by Minikube, Kubeflow, and Arrikto Rok data management platform.
Data scientists can continue to enjoy the same great automated workflows on AWS as they currently do on GCP and their laptop.
- Accelerate model development and training with an integrated end-to-end all-in-one data science platform that runs in the cloud and on-premises
- Develop models in familiar tools without having to manage libraries and build docker images
- Automate complex model code to pipeline workflows
- Increase model accuracy and train faster with automated hyperparameter tuning
- Visualize multi-step pipeline graphs
- Debug faster by reproducing the state of each pipeline step at a click of a button
- Achieve global data mobility with advanced Kubernetes data management automation
We are excited to continue advancing machine learning efforts for organizations of all sizes and to make the lives of data scientists easier by letting them focus on building models rather than managing infrastructure.
Getting Started Instructions
To install MiniKF on AWS, follow the steps below:
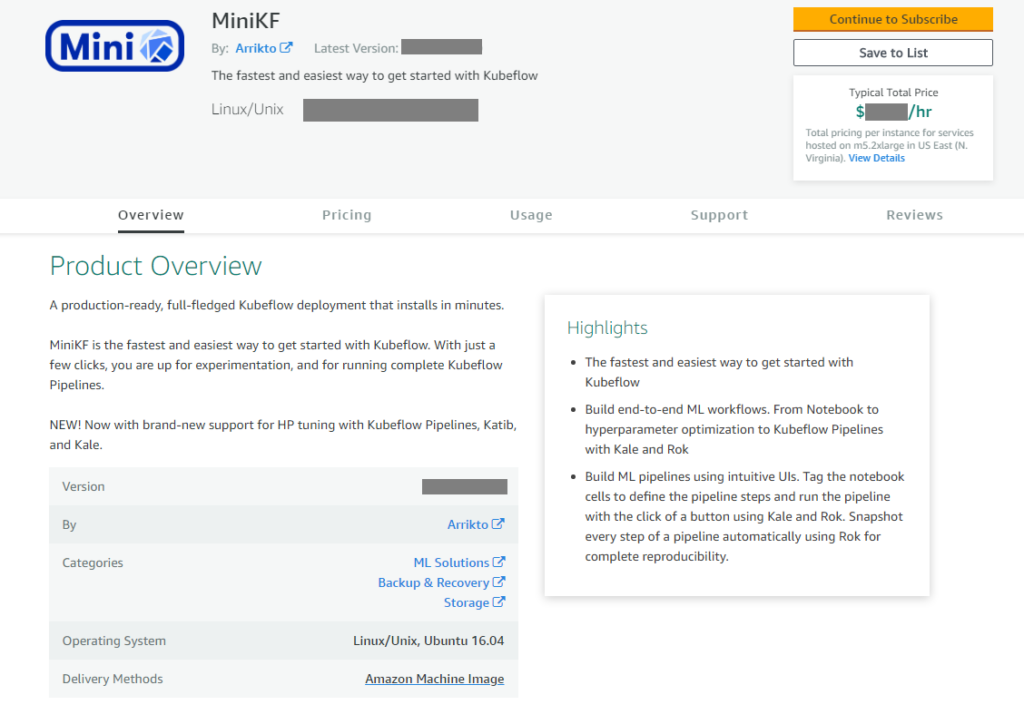
Step 1: Go to the MiniKF page on the AWS Marketplace
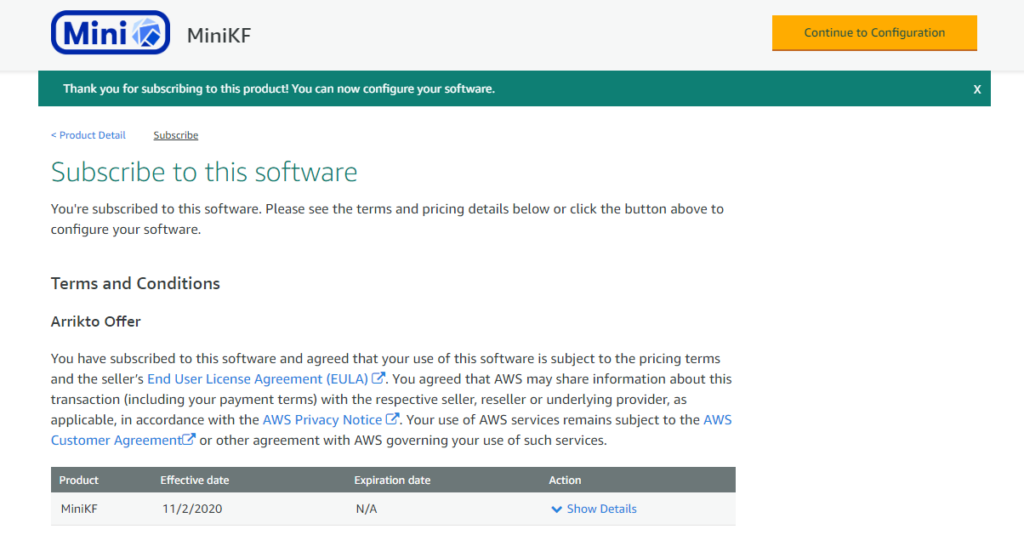
Step 2: Click on the Continue to Subscribe button
Step 3: Click on the Accept Terms button

Step 4: Wait for a few minutes and the click on Continue to Configuration
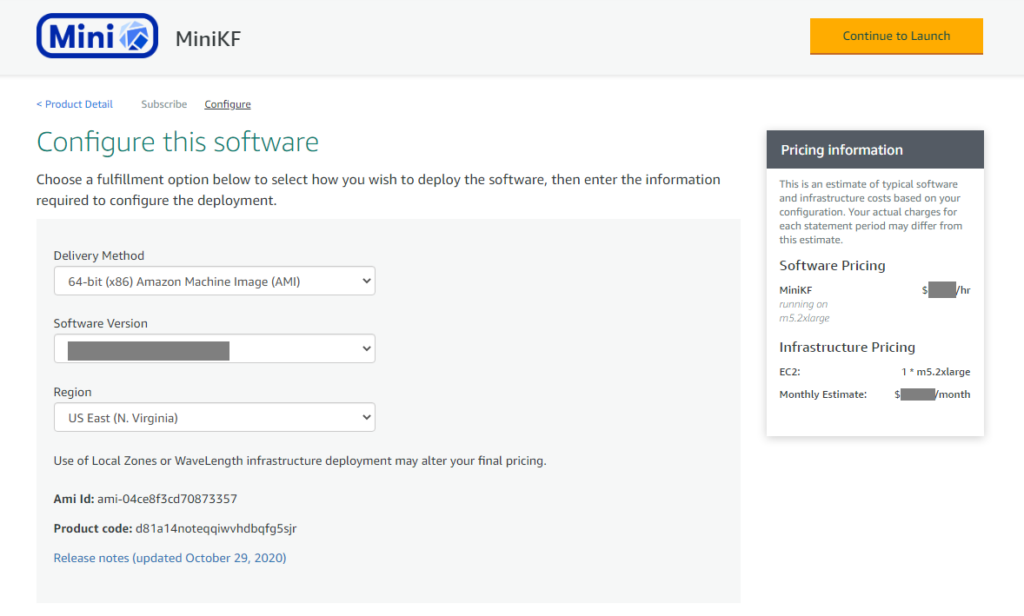
Step 5: Select a Region. We recommend you keep the default values for Delivery Method and Software Version. Then click Continue to Launch
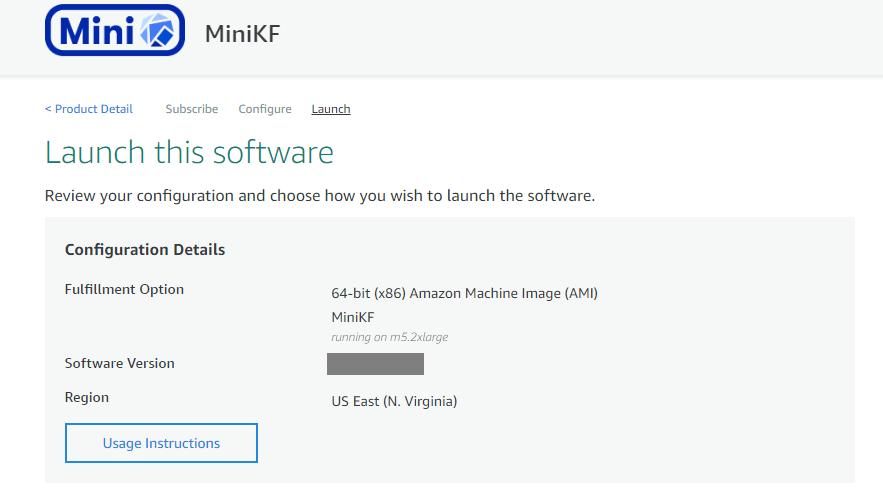
Step 6: Here you can review your configuration details. Don’t forget to view the Usage Instructions and keep them handy, as you are going to need them later.
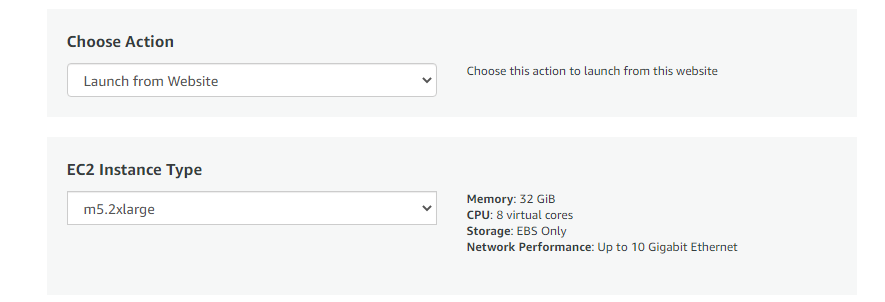
Step 7: You can also select how to launch MiniKF or change the EC2 instance type. We recommend you leave the default value for Choose Action. We recommend that you keep the default EC2 Instance Type (m5.2xlarge) or choose an even more powerful instance. Choosing a VM with reduced specs may make it impossible to train ML models.
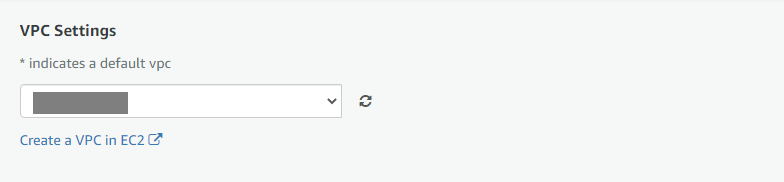
Step 8: Choose an existing VPC or create a new one. If you create a new one, make sure you click on the refresh icon to update the contents of the list, so that your new VPC appears in it.
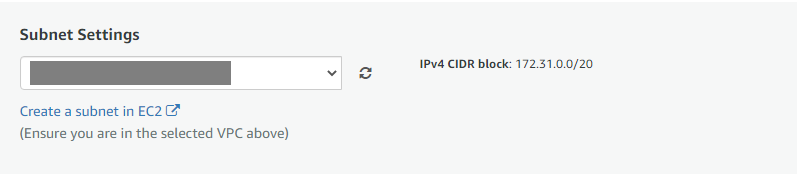
Step 9: Choose an existing Subnet or create a new one. If you create a new one, make sure you click on the refresh icon to update the contents of the list, so that your new subnet appears in it.
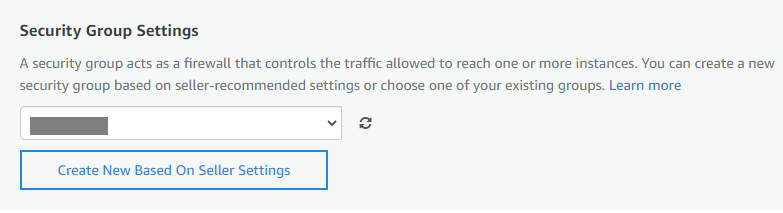
Step 10: We strongly recommend to create a new security group. Otherwise you may not be able to access your MiniKF. To do so, click on Create New Based On Seller Settings
Note: If you need to use an existing security group, make sure it covers the ports mentioned in the usage instructions (see at the top of this page).
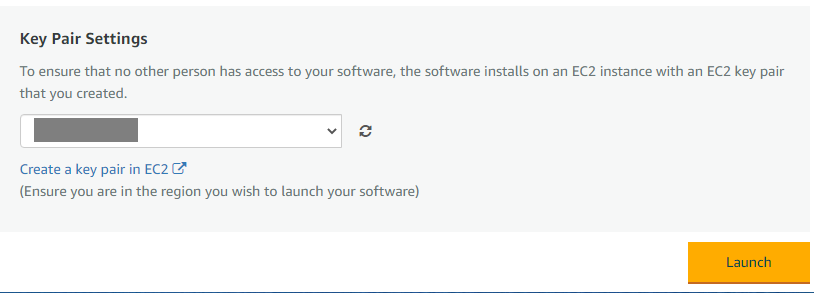
Step 11: Choose an existing Key Pair or create a new one. If you create a new one, make sure you click on the refresh icon to update the contents of the list, so that your new key pair appears in it.
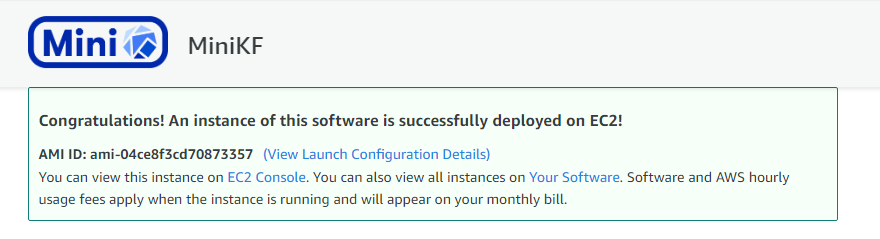
Step 12: Click Launch. You will then see a message informing you about the successful installation. The message contains a link to view the instance on the EC2 Console. Click on it.
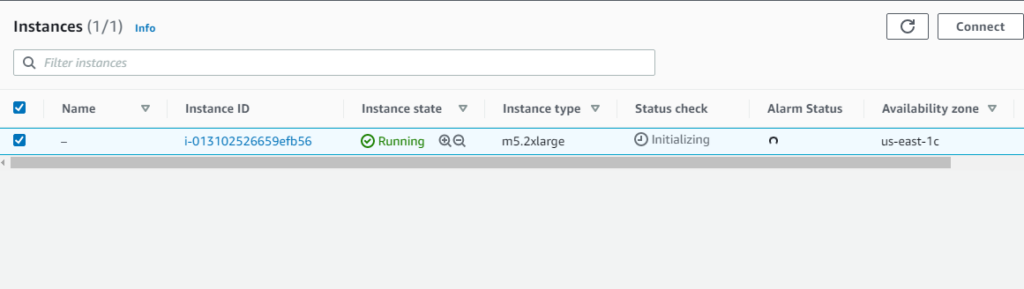
Step 13: You should now see a screen like this. Click on the Instance ID of the created instance
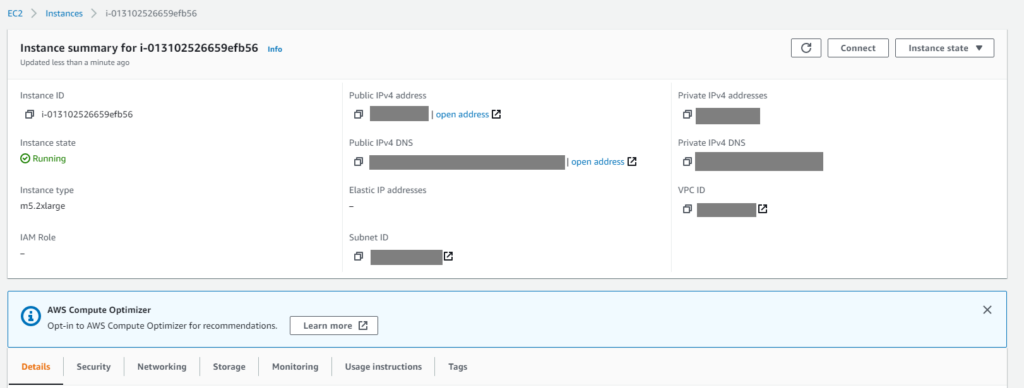
Step 14: You will then see this page. Click Connect to connect to the instance using EC2 Instance Connect
Note: this will only work if you have created a security group based on seller settings, as in step 10, or you have configured a security group based on the usage instructions. Otherwise, you need to SSH to the instance manually, see: https://docs.aws.amazon.com/AWSEC2/latest/UserGuide/AccessingInstancesLinux.html
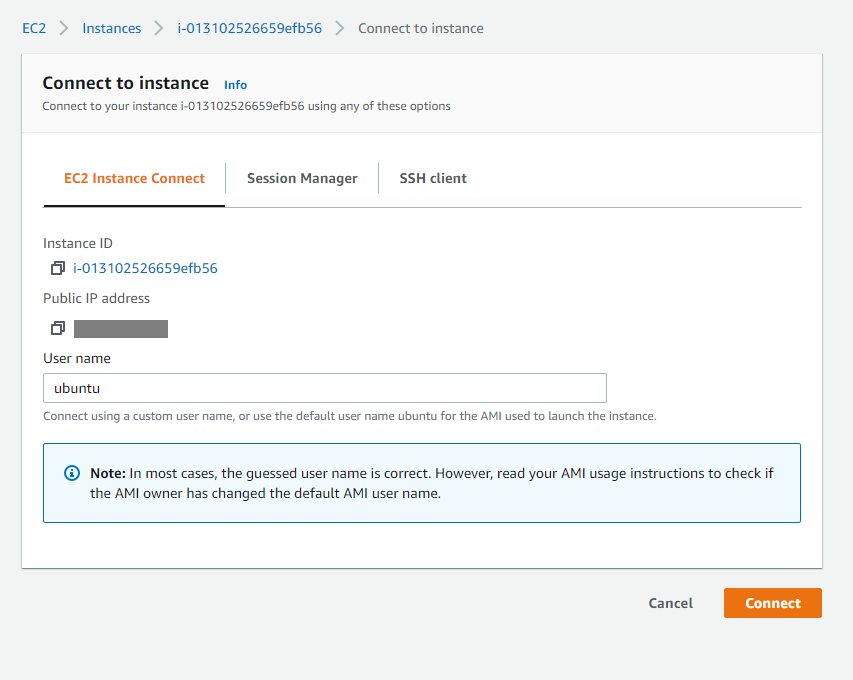
Step 15: The User name will be prefilled. Click Connect
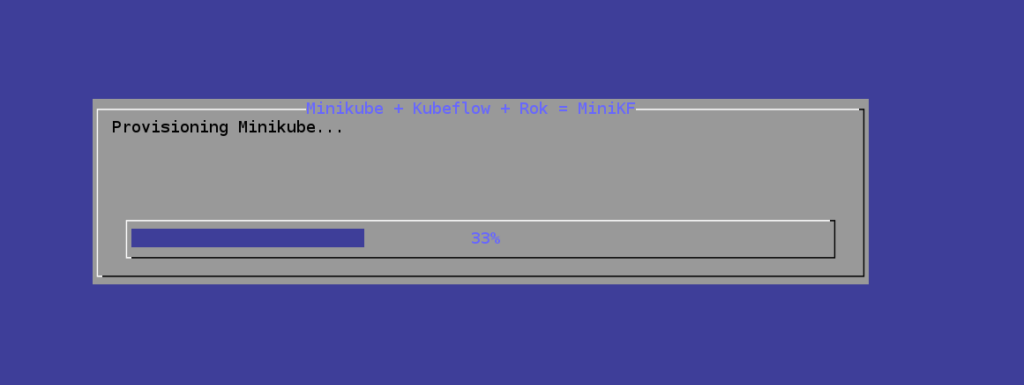
Step 16: Follow the on-screen instructions and type minikf to view the progress of the deployment

Step 17: Wait for a few minutes
Step 18: Once the installation is completed you will see this screen

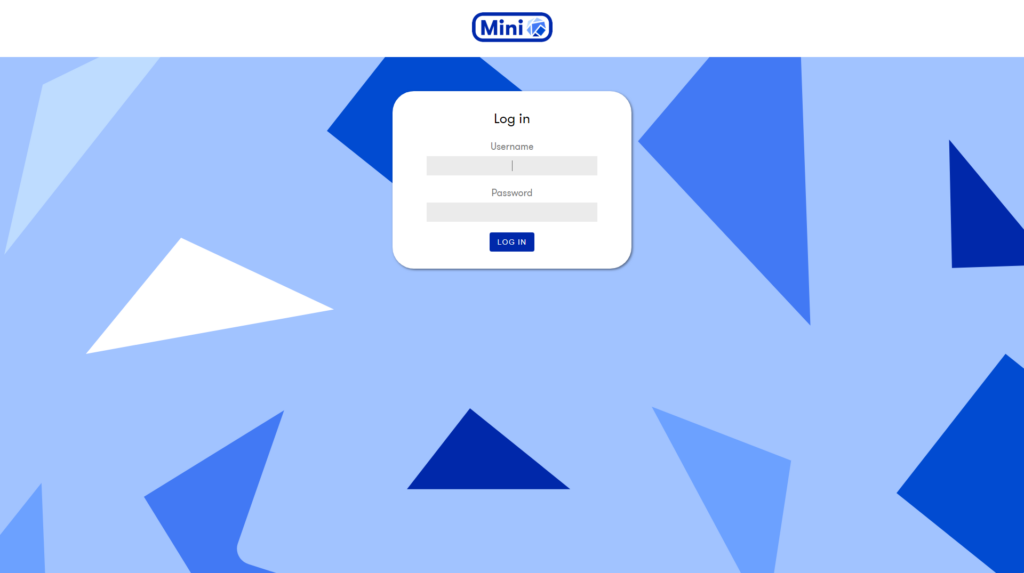
Step 19: Follow the URL and log in to MiniKF using the provided username and password.
Note that MiniKF uses a self-signed certificate, so you will have to follow this guide to proceed to the MiniKF dashboard.
Step 20: Once you log in, you will see the MiniKF Dashboard
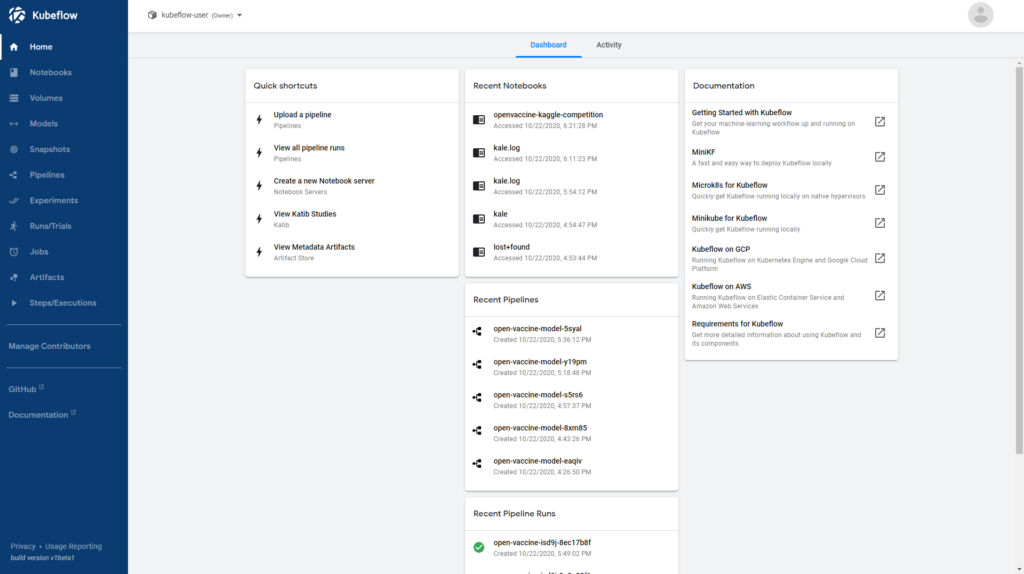
Congratulations! You have successfully deployed MiniKF on AWS. You can now create notebooks, write your ML code, and run Kubeflow Pipelines.